Are you following A/B testing best practices for your opt-in marketing campaigns? If you’re not, then chances are you’re missing out on major opportunities to grow your subscribers and improve conversions.
Website split testing is an essential conversion optimization practice. But “essential” definitely doesn’t mean “easy.”
Fortunately, this guide will help you learn how to A/B split test like a pro!
We’ll share some A/B testing best practices to help you get reliable results to attract more leads and boost subscriber numbers.
Why You Should Split Test Your Marketing Campaigns
There are several reasons why split testing website marketing campaigns makes sense. A/B testing helps you make decisions based on data, rather than guesswork. That way you know for sure when a particular marketing tactic or campaign is working.
Or, more importantly, when one is tanking.
It also helps you avoid the case study trap. That’s when people read case studies and copy the tactics mentioned, without knowing for sure if they’ll work for their own business.
Here’s the brutal reality of marketing: every business is different, and you can’t assume that what worked for others will work for you.
When you A/B test a website’s marketing campaign, you can experiment with different ideas. This is useful because sometimes a small change can make a big difference to the results you get.
Take American Bird Conservancy for example. They were able to increase their lead collection over 1000% through A/B testing minor changes on their OptinMonster campaigns.
And there’s no reason why you can’t see the same success, too.
One of the key areas to test to increase lead generation and subscriber growth is your optin form. This is where people sign up to become subscribers or leads.
But when you’re testing out optin forms, which areas should you focus on?
What Areas Should You Split Test in Your Marketing Campaigns?
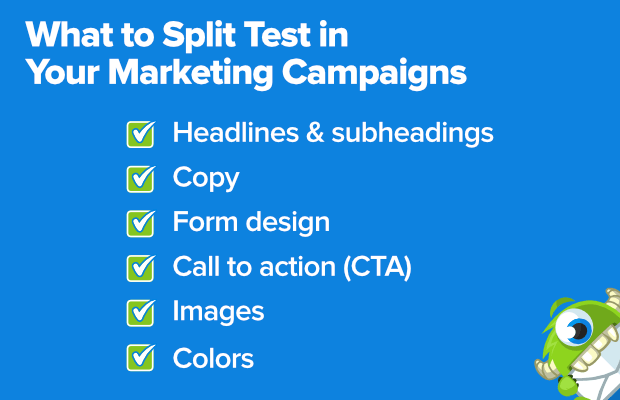
You’ll want to pay attention to form layout best practices so you can create the best optin forms possible. There are a number of key areas to test, including:
- Headlines and subheadings
- Copy
- Form design
- Call to action (CTA)
- Images
- Colors
Learn more in this guide on which split tests to run for a successful optin form.
Now, let’s get to the A/B testing best practices. Whether you’re testing forms or split testing your web page, there are some best practices that always apply:
Here’s a quick table of contents so you can navigate more easily if you’re pressed for time:
- Test the Right Items
- Pay Attention to Sample Size
- Make Sure Your Data’s Reliable
- Get Your Hypothesis Right
- Schedule Your Tests Correctly
- Nail Your Test Duration
- Don’t Make Mid-Test Changes
- Test One Element at a Time
- Keep Variations Under Control
- Pay Attention to the Data
- Always Be Testing
How to A/B Split Test: A/B Testing Best Practices
1. Test the Right Items
One of the most important website testing best practices is to test items that make a difference to the bottom line.
For example, Hubspot suggests you optimize the pages people visit most:
- Home page
- About page
- Contact page
- Blog page
Or you may want to focus on your key lead generation pages. That means optimizing optin forms on your:
- Webinar signup page
- Ebook landing page
- Lead magnet page
To find your most visited pages in Google Analytics, go to Behavior » Site Content » All Pages:
Once you know what these are, you’ll know where to place email subscription and lead magnet optin forms.
2. Pay Attention to Sample Size
Another best practice for A/B testing is to get the sample size right.
If you don’t perform your test on enough people, you won’t get reliable results. If one campaign gets 150% more engagement, that’s great.
Unless your total traffic was 5 readers. Then you actually don’t have much reliable data after all because your test sample is too small.
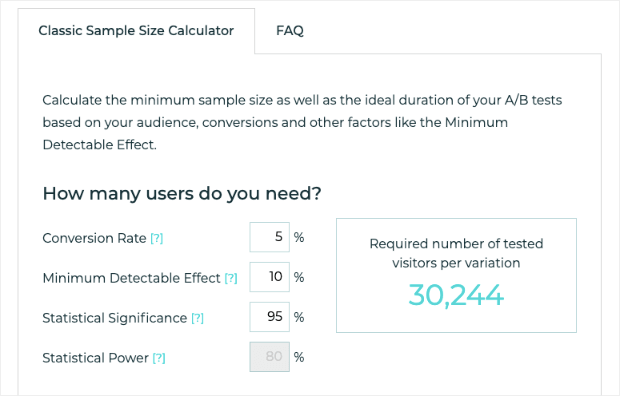
One of the best ways to work out the ideal sample size is to use A/B Tasty’s sample size calculator. Put in your current conversion rate, plus the percentage increase you’d like to see, and it will automatically calculate the number of visitors you’ll need for your A/B test:
NoteYou can also change Statistical Significance if you want, but a safe bet is to keep that metric at 95%.
3. Make Sure Your Data Is Reliable
With website split testing, there’s another important measure of data reliability called statistical significance. In simple terms, this is a way of determining that your results aren’t caused by random chance.
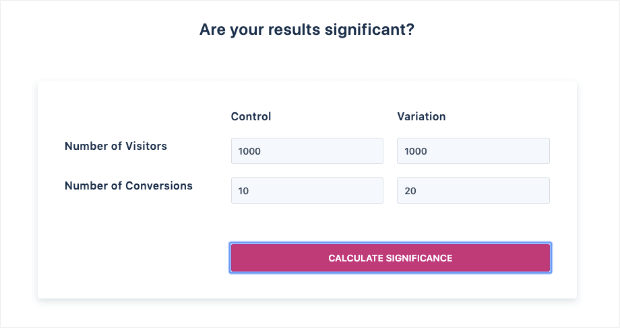
To identify statistical significance for your A/B test, use Visual Website Optimizer’s (VWO) statistical significance tool.
Type in the number of visitors you’ve tested for your original marketing campaign (called the control) and the one you’ve changed (called the variation). Then press the Calculate Significance button:
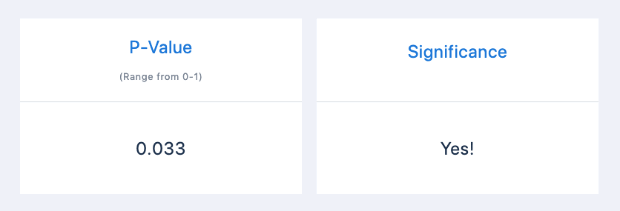
You’ll get a result that shows the P-value (another measure of reliability), and tells you whether the test has statistical significance by showing Yes or No:
If you get a Yes, congrats! If you get a No, you may need to go back to the drawing board and adjust your metrics.
4. Get Your Hypothesis Right
When you start testing anything without a hypothesis, you’re pretty much just wasting time.
A hypothesis is an idea about what you need to test, why it needs to be tested, and what changes you’ll see after you make any changes.
With this structure in place, you’ll know the scope of your test and when it succeeds or fails. Without it, your testing is nothing more than guesswork.
To form a hypothesis, use this template from Digital Marketer:
Because we observed [A] and feedback [B], we believe that changing [C] for visitors [D] will make [E] happen. We’ll know this when we see [F] and obtain [G].
Here’s an example of how you could fill this in for your email newsletter optin form:
Because we observed a poor conversion rate [A] and visitors reported that our optin form was too long [B], we believe that reducing the number of form fields [C] for all visitors [D] will increase newsletter signups [E].
We’ll know this when we see an increase in newsletter signups over a 2 week testing period [F] and get customer feedback that shows that people think the optin form is less complicated [G].
Read that example carefully (twice if you have to!) and create a hypothesis of your own with this structure.
5. Schedule Your Tests Correctly
Test scheduling is one of the most crucial A/B testing best practices.
Here’s why: if you’re not testing apples against apples, you can’t trust the results.
In other words, in order to get reliable results, you’ll need to run your A/B tests for comparable periods.
Don’t forget to account for seasonal peaks and plateaus. Testing your traffic over Black Friday and comparing it to a regular ol’ Tuesday in February probably won’t give you the most reliable data.
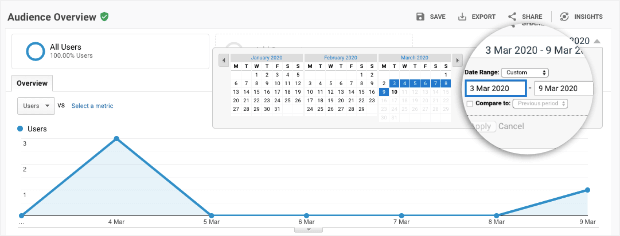
To find out how your traffic performs over a couple of months, login to Google Analytics. Go to Audience » Overview. The section you’ll want to focus on is the date range in the top right-hand corner:
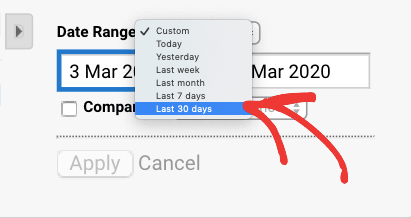
Change the period to Last 30 days:
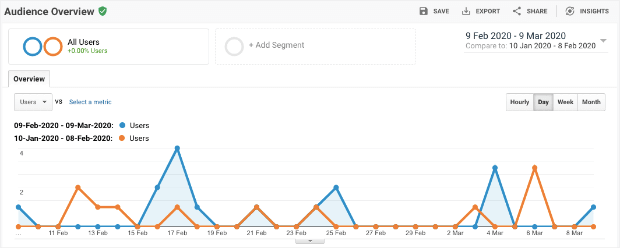
Then click on Compare To and the previous 30 days will automatically be selected:
Click Apply and you’ll get a quick snapshot of traffic patterns:
This will give you a better idea of traffic patterns so you can select an ideal period to run your A/B test.
But, to be honest, you probably already have a good idea of your high and low seasons. So just make sure you’re comparing high seasons with high seasons and low seasons with low seasons.
6. Nail Your Test Duration
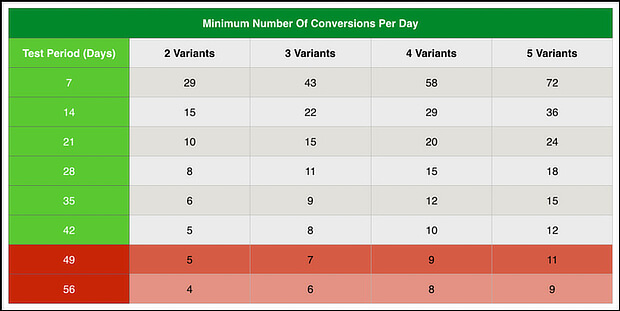
Test duration is another essential factor in determining the reliability of your results. If you’re running a test with several variants and want 400 conversions, you’ll need to test for a longer time than you would for a test with one variant and 100 expected conversions.
Use this chart from Digital Marketer to work out the ideal duration for split testing your website optin forms:
7. Don’t Make Mid-Test Changes
It’s easy to get so excited about the results you’re seeing during a test that you want to rush out and implement more changes.
Don’t do it.
If you interrupt the test before the end of the ideal testing period (see the previous tip), or introduce new elements that weren’t part of your original hypothesis (see tip #4), your results won’t be reliable.
That means you’ll have no idea whether one of the changes you made is responsible for a lift in conversions.
Instead, set a date to run your test and stay strong. Just sit tight, wait for the results to come in, and take action when the test has finished.
8. Test One Element at a Time
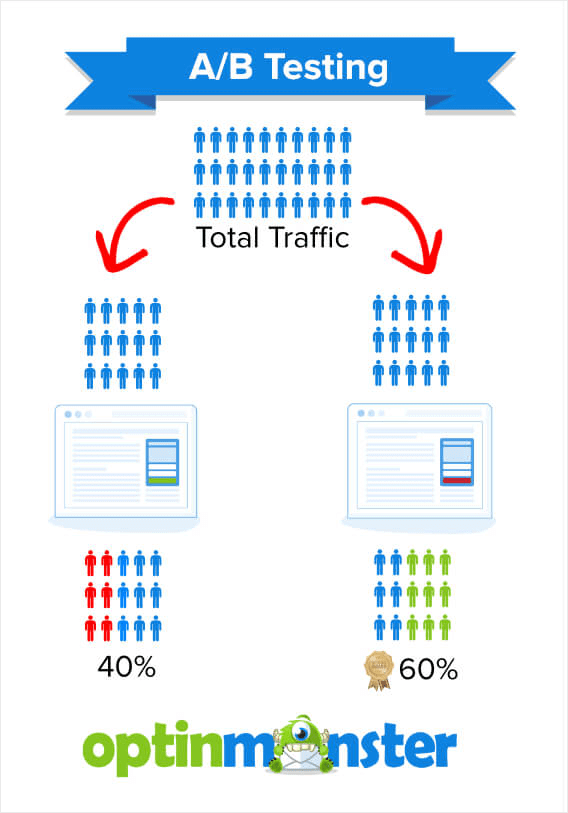
One golden rule of A/B testing forms and web pages is to test one element at a time.
If you’re testing an optin form for marketing, test for changes in the headline, the changes in the call to action, OR changes in the number of form fields.
Again, notice the emphasis on “or” rather than “and.” It should just be one.
This is the only way you’ll know for sure if there is ONE element that makes a difference in your lead conversions.
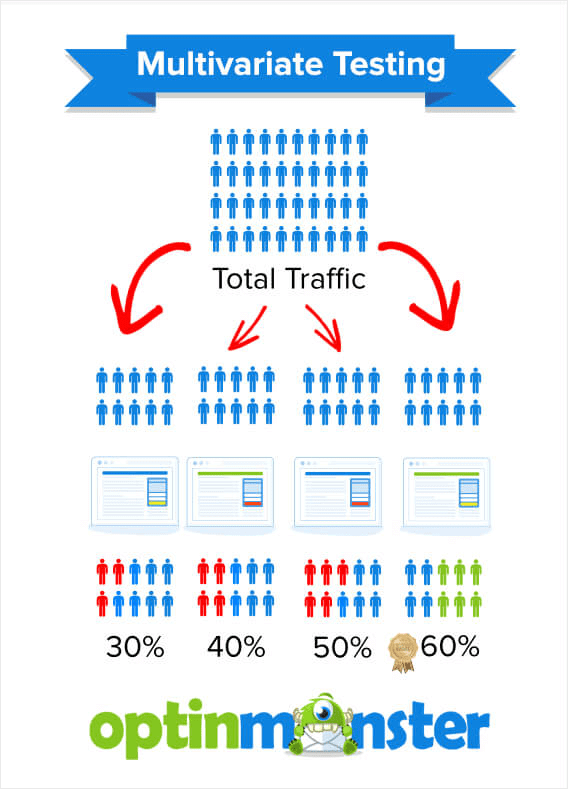
If you test more than one element, then you need multivariate testing. We explain the difference in our guide to split testing vs. multivariate testing.
Multivariant testing is a bit more complicated and, sadly, we don’t have time to explore it today. So check out the article mentioned above which should have everything you need to get started!
9. Keep Variations Under Control
Related to that, don’t test too many variations at once. That’s a classic split testing mistake. As you saw in the Digital Marketer table, the more variations there are, the longer you have to run the tests to get reliable results.
A/B testing best practices suggest you test between 2 and 4 variations at the same time. That gives the best balance of test duration and efficiency.
10. Pay Attention to the Data
We’ve all got gut feelings about how our marketing is performing, but the great thing about split testing is that it gives you data to either back up those feelings or to show that you’re wrong.
Never ignore the data in favor of your gut. If you’ve followed our advice on how to create split tests, you’ll get reliable data that’ll help you to improve conversions.
11. Always Be Testing
Our last tip is always be testing. Once you’ve got enough data from your original campaign, you can start using A/B testing to improve your results.
Incremental changes can soon add up, as many OptinMonster customers have found. Escola EDTI used split testing to get a 500% boost in conversions:
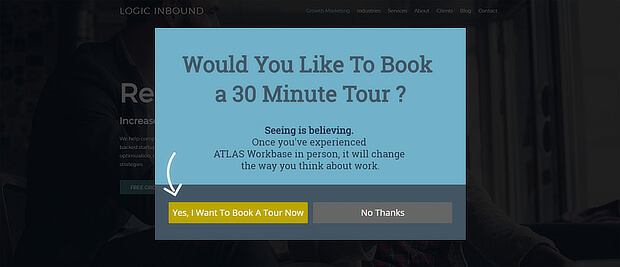
And Logic Inbound got a whopping 1500% conversion boost by split testing its OptinMonster marketing campaigns:
A 1500% conversion boost is no small accomplishment! And if you follow our 11 A/B split testing best practices, we’re confident that you can achieve the same!
How to A/B Split Test Your Campaigns with OptinMonster
Want to A/B test your own marketing campaigns so you can aim for similar results? We’ll tell you how to do that in this section with the A/B testing tool that’s built into OptinMonster.
But first, follow our instructions to create and publish your first campaign.
If you’re more of a visual learner, feel free to check out this video tutorial on creating an A/B split test with OptinMonster:
But for those of us who still enjoy reading, follow along with the directions below.
Once you have a campaign that you’re happy with, you’re ready to run a split test. From the OptinMonster dashboard, click the campaign you want to work on:
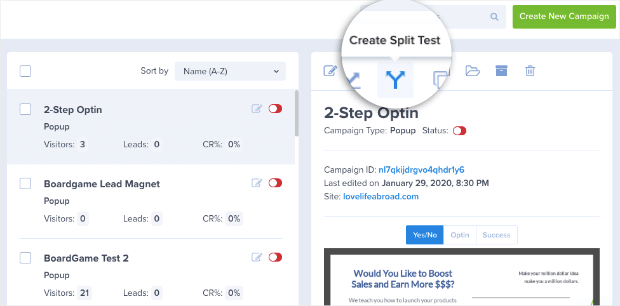
Select A/B Split Test (it looks like a little icon with two arrows going in opposite directions):
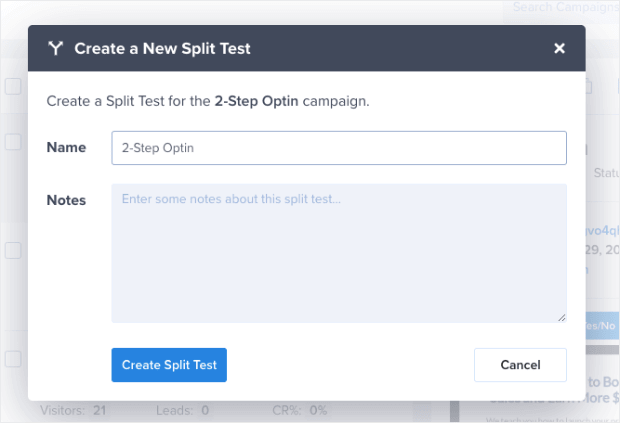
This will bring up a box where you can name your test and add some notes about the change you plan to make. Remember, you’re only going to change a single element right now.
When you’ve given your campaign duplicate a name and added some notes, click Create Split Test:
Then you’ll be in your campaign builder. Now you can make your changes to your campaign just like you would for any other campaign you’ve built with OptinMonster.
When you’re finished, save and publish the campaign as normal:
OptinMonster will automatically segment your audience and collect conversion data, which you will see in the conversion analytics dashboard:
After enough time has passed for your test, you’ll be able to see which campaign converted more leads.
Then you can return to your OptinMonster dashboard and click on the campaign you split tested. You’ll see the original campaign and, when you scroll down, you’ll see the duplicate campaign you used for split testing.
Select Make Primary for the campaign that is getting the best results:
Here is how that looks:
And that’s it!
Now that you know how to use the A/B testing best practices that’ll make a real difference to conversions, check out our guide to split testing your email newsletters. This will teach you how to run A/B split test to enhance your email marketing strategy.
But now we’d like to hear from you! Do you have any split test tips we missed?
If so, we’d love to know them! Reach out to us on Facebook and Twitter for more in-depth guides. And for some killer tutorials, head over to our YouTube channel.
Just be sure to like any videos you find valuable ?.
Finally, do your marketing strategy a favor and join OptinMonster today!








Add a Comment