Do you know what your visitors secretly think of your site, products, and services? Create a survey to find out!
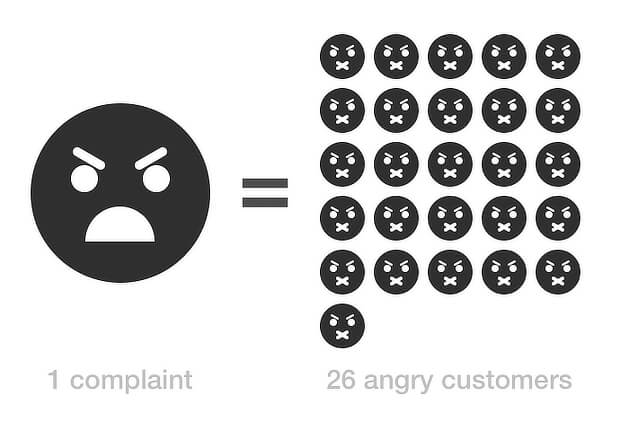
If people land on your site, hate what they see, and go away, you could be losing a lot of business. As Groove points out, for every customer who complains, there are 26 more who leave unhappy without saying a word.
But what if you could become a mind reader, gain insight into your visitors’ secret thoughts, and regain some of that lost business?
The best way to do that is to ask, and a WordPress survey popup is a great way to do that. It’ll help you ask questions at the right time to gain true insight from your visitors.
In this article, we’re going to show you how to create a survey for your WordPress site and embed it in a popup so you can control when your visitors see it.
Why a WordPress Survey Popup?
There are lots of ways a WordPress popup survey can help your business. For example, you can:
- Discover how your visitors are interacting with your site
- Figure out potential problems that are getting in the way of conversions, leads, and sales
- Get real-time feedback from visitors and customers
- Reduce abandonment and increase conversions by interacting with visitors before they leave your site
- Segment your visitors for future marketing
- Grow your email list
ConversionXL cites one example where a popup survey helped to clarify what visitors were most interested in. They tweaked the messaging according to what they learned, and conversions increased up to 23.9% on some pages.
Best Practices for Survey Questions
Need some help creating survey questions? Here are a few best practices to follow.
- Ideally, keep survey questions short, so the survey is easy to understand and complete.
- If asking multiple questions, put them in a logical order.
- Make sure the questions are direct and don’t lead respondents into the answer you’d like to hear.
- Ask open-ended questions rather than yes/no questions that will make respondents think.
Here are some questions you could ask in different situations:
Getting Feedback on a Website Design
- What did you like best about our website?
- What did you dislike most about our website?
- How could we improve your experience on our site today?
Assessing the Effectiveness of your eCommerce Site
- Were you able to find the items you wanted today?
- How can we improve your experience the next time you visit?
- Would you like to find out about new deals? If so, please enter your email below.
Real Estate Lead Generation
- Did you find the property you were looking for today?
- Where are you looking for a property?
- What is your price range?
- Are there any other must-haves for your new home?
Once you’ve chosen your questions, you’ll need to decide how to implement the survey on your site.
Want the full details on how to build the best online survey? Check out these survey best practices. Also check out these best online survey tools to make your job a lot easier.
Which Popup Survey Tools Should You Use?
Which tools should you use to create your WordPress survey? A combination of WPForms and OptinMonster, the best WordPress popup plugin, is an effective option for WordPress sites.
We recommend WPForms, a drag & drop WordPress form builder plugin because it:
- is flexible, allowing you to create any kind of survey form you want
- stores the survey data so you can access it easily from your WordPress dashboard
- integrates with MailChimp so you can easily collect leads for your email marketing
- can send immediate notifications of WordPress survey responses so you can follow up with respondents immediately, or take quick action if there’s an issue to resolve.
If you’re not using WPForms, you can also create your survey in Google Forms.
Creating the WordPress survey is just one part of the equation. You also have to find a popup tool so you can control when the survey appears and who sees it. That’s where OptinMonster comes in.
OptinMonster lets you:
- Create attractive popup surveys via a wide range of themes and templates for every situation
- Change the timing of the survey popup so you don’t annoy visitors by showing it too soon
- Collect page-specific, actionable feedback by using OptinMonster’s advanced page-level targeting to show your survey only to people visiting certain pages
- Show different surveys to visitors based on referral source, location, and even previous behavior on your site
- Target visitors who are just about to leave your site or abandon their carts by using OptinMonster’s signature Exit Intent® technology to display a survey on the website just before they leave, and maybe stop them from leaving.
How to Create Your Popup Survey Form with WPForms
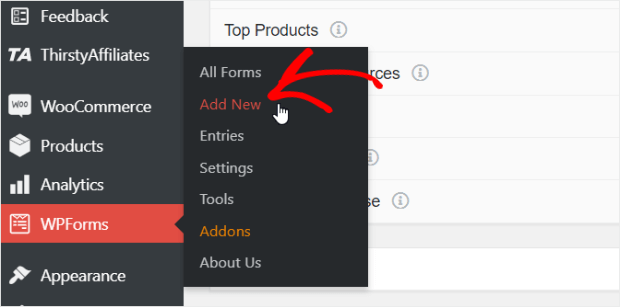
Login to your WordPress dashboard and go to WPForms » Add New.
We’re going to use the Survey Form.
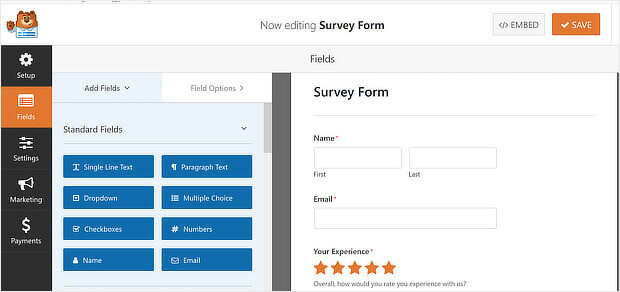
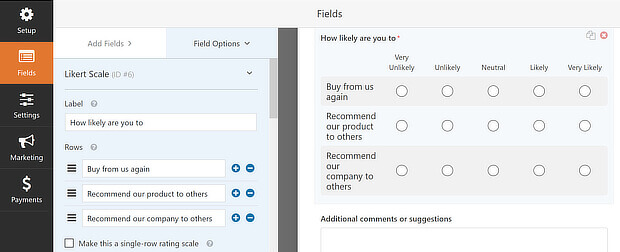
Once you click to create your survey form you’ll be taken into the form builder. You’ll see the default survey form on the right of your screen. And there are field choices on the left.
The default form includes a name and email field, as well as several common survey questions.
Hover your mouse over any group of survey fields to be able to move them around or delete them.
Save your form as you go.
You can add or edit fields at any time.
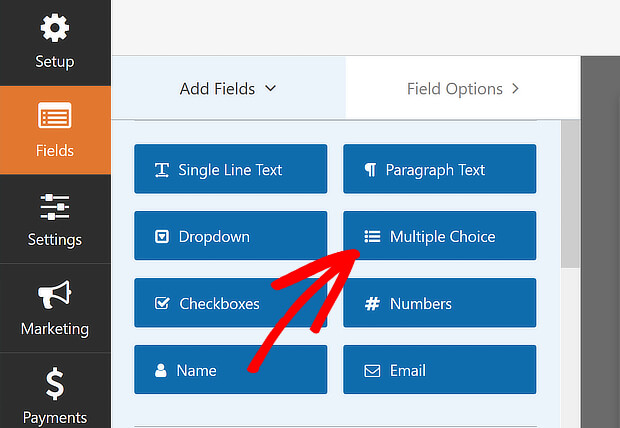
For example, you could add a multiple-choice questionnaire for a small business website. Click on Multiple Choice.
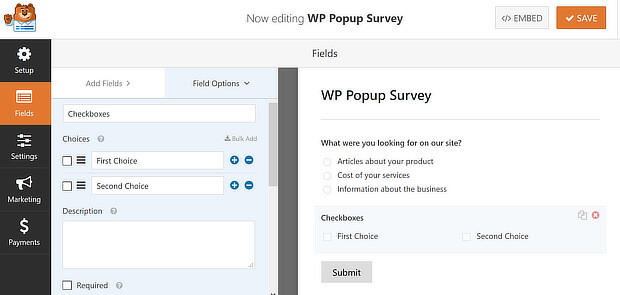
Click on the preview to change the name of the section. We’ve used the space to ask a question. Next, edit the default fields, and add your own choices.
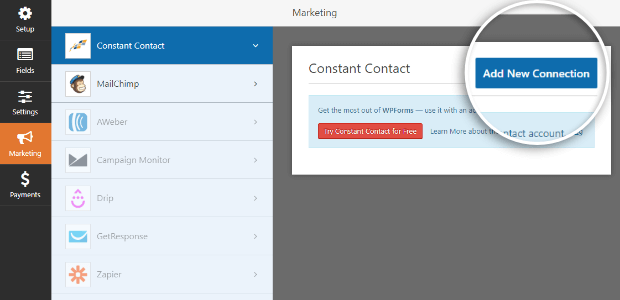
If you want emails collected to integrate with your email marketing software, go to Marketing, and enable one of the email marketing integrations.
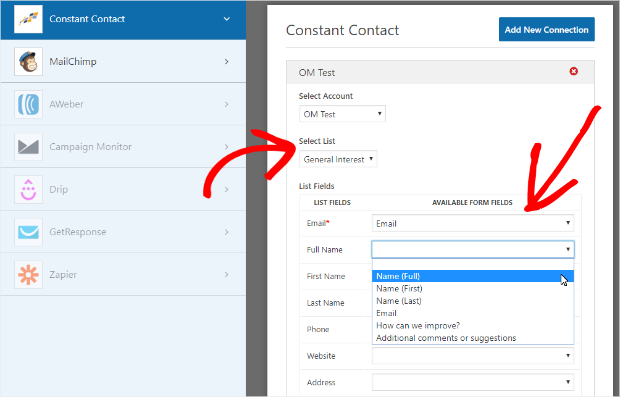
We’re using Constant Contact. Click the button, click Add New Connection, and give the connection a name. Save, and then the page will fill with your integration data.
Choose a list, then select the form fields you want to match with Constant Contact. Save.
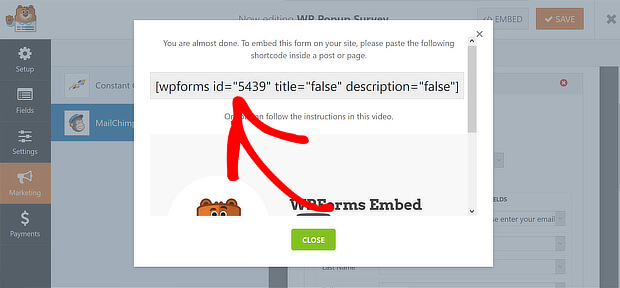
Click Embed to bring up the code you’ll need to add the survey to OptinMonster and create your WordPress survey popup. Keep it handy.
Now, let’s go back into OptinMonster to continue setting up your WordPress survey popup. Here’s how you do it.
Step 1. Create a Campaign
To create your OptinMonster survey popup, log in to the OptinMonster dashboard, and press Create Campaign.
Choose a campaign type. We’re going to use the Popup, which is proven to get visitors’ attention, so they won’t miss your survey.
Choose a theme for the campaign. We’re going to use Canvas, which allows you to easily integrate code from other sites for a wide range of popup types. (For example, you can easily create a Facebook popup with the Canvas theme).
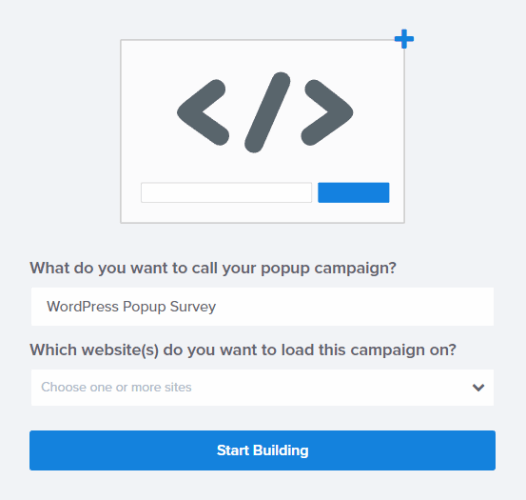
Give the campaign a name and press the Start Building button.
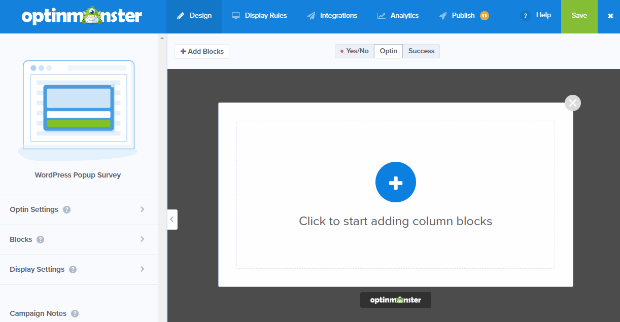
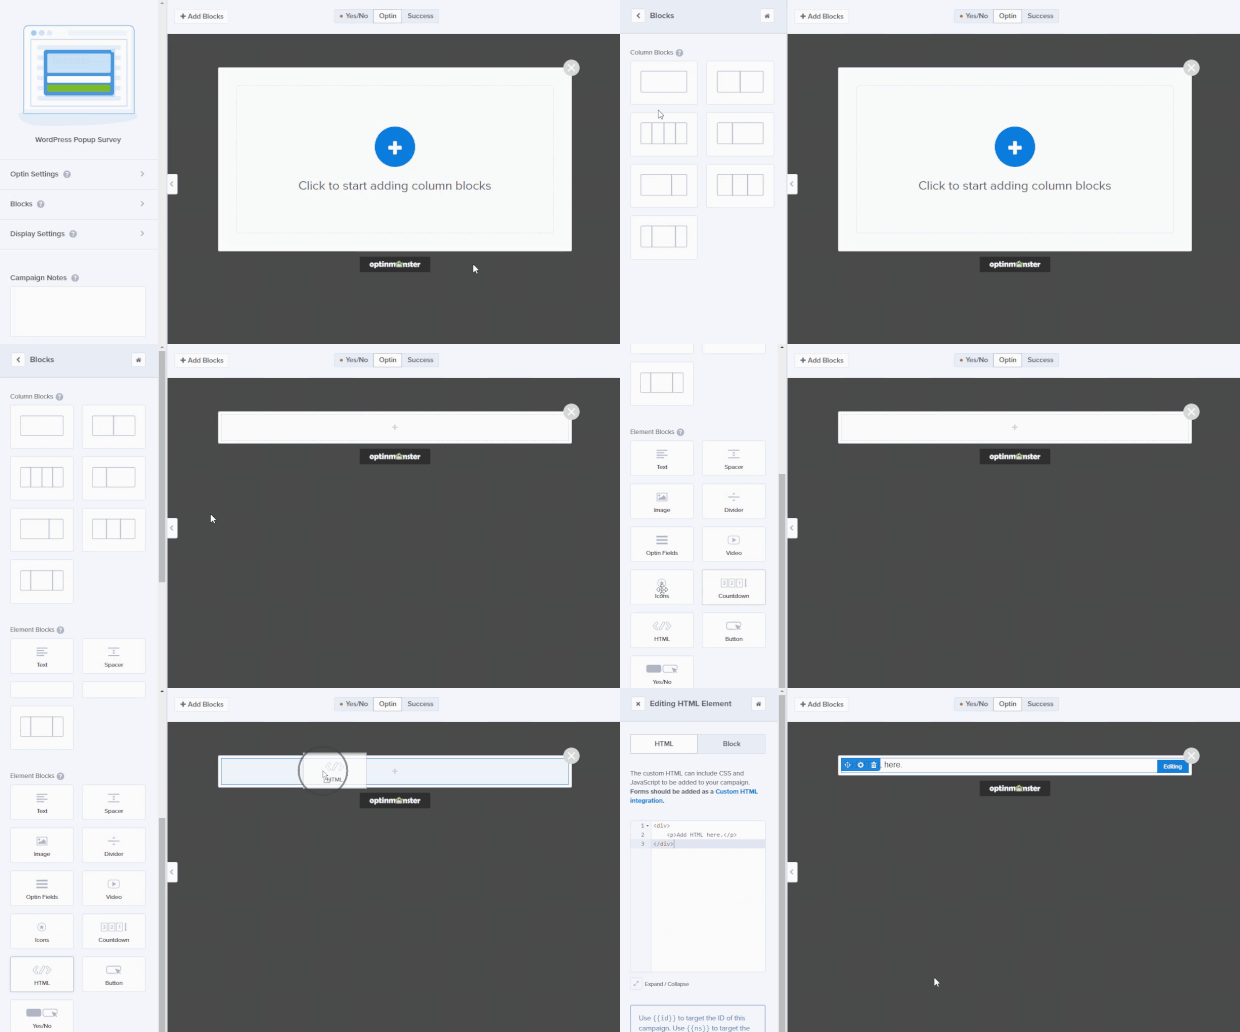
That’ll take you to the Optin tab of the OptinMonster campaign builder, where you’ll see a blank Canvas template.
Step 2. Edit the Campaign
Go back to the tab with the survey popup you created in WPForms and copy the survey embed code.
Then return to the OptinMonster campaign builder, and click the live preview of the campaign to add a new block to your campaign.
We’re going to go with the large rectangle. Just drag and drop the block from the lefthand editing tools to your live preview. Then, do the same to add the HTML element to your campaign.
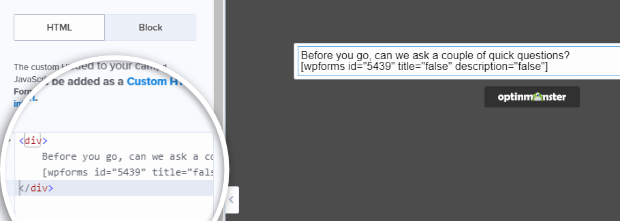
Paste the survey shortcode into the HTML block. If you want to add any other text, you can also put it here. We’ve added some introductory text so our form has a friendly tone.
You’ll see the WPForms shortcode in the preview area. Don’t worry, the survey will pop up once the campaign is live on your site.
Save your campaign.
Step 3. Set the Display Rules
OptinMonster has a wide range of powerful display rules you can use to change when your WordPress survey appears, and who sees it. We’re going to set display rules now.
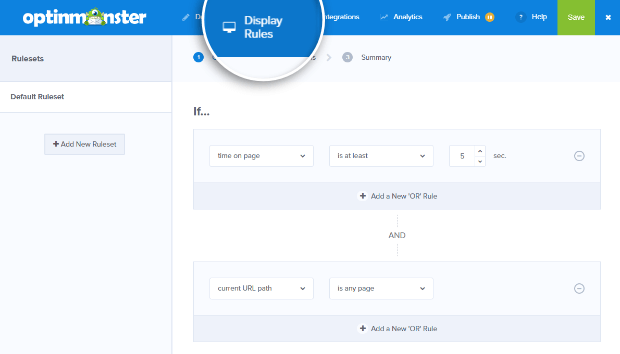
First, go to the Display Rules tab. You’ll see that the time on page and current URL path is any page rules are enabled by default. This ensures that anyone who’s been on any page of your site for a short while will see your campaign.
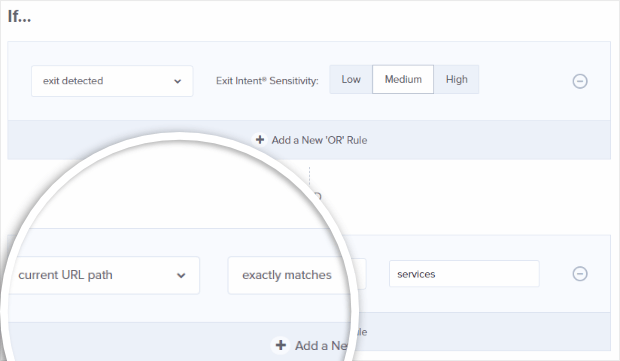
We’re going to set this survey to appear On Exit-Intent®.
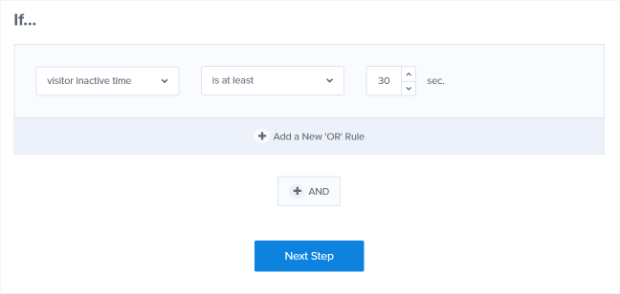
This powerful technology detects when people are about to leave your site, and shows your popup at precisely the right time to grab their attention and stop them from leaving. This effect is available for mobile campaigns using OptinMonster’s InactivitySensor™.
You can also make the WordPress survey popup page-specific with page-level targeting. By default, current URL path is set to any page so that all visitors will see your campaign even if you don’t specifically enable a rule, but you can change this so the survey appears on a specific page.
For example, you might want to have it appear on your shopping cart or checkout pages, to get feedback from customers who are about to abandon their carts. Or you could put it on your lead magnet landing page, to try to understand why your conversions are low.
In our example, we’ve added the URL of the website’s services page.
You can also see our tutorial on how to trigger your WordPress popup on click.
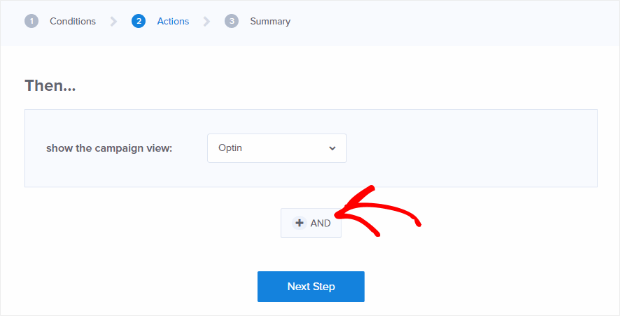
You can make your WordPress survey popup stand out even more by adding a display effect or a sound effect. After setting your display rules, click Next Step. You’ll be given the option to confirm the view of your optin you want to see displayed (Yes/No, Optin, or Success). You can click the +And button below to add a display or sound effect.
Go ahead and add a sound effect. We’ve selected Flam (which sounds much more elegant than the name would lead you to believe ?).
Save your campaign.
Step 4. Save and Publish Your Campaign
When you’ve completely finished editing your survey popup, save it again, and go to the Publish tab. Set the Status to Live and save the campaign one last time.
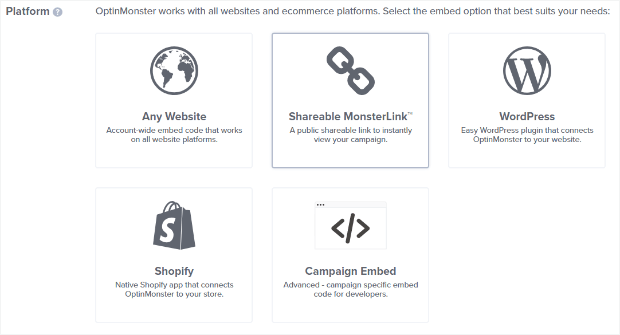
This will bring up the publishing options. You can publish your survey popup campaign:
- Via sitewide embed code so it appears across your site
- Via campaign-specific embed code, so you can publish just that single campaign
- With a Shareable MonsterLink™, which lets you share your survey anywhere, for example via your social media profiles
- On WordPress
Step 5. Tweak Your WordPress Survey Popup Settings
When you start using OptinMonster, part of the process is installing the connector plugin. That ensures your campaigns display on your WordPress site, but that’s not all it does. It also lets you further refine how those popups display on your website.
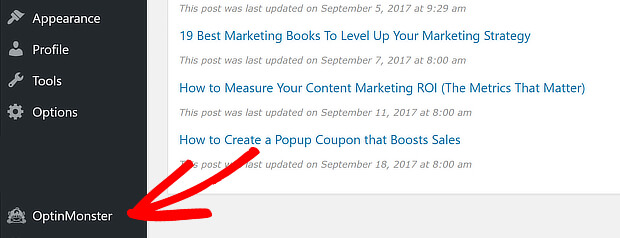
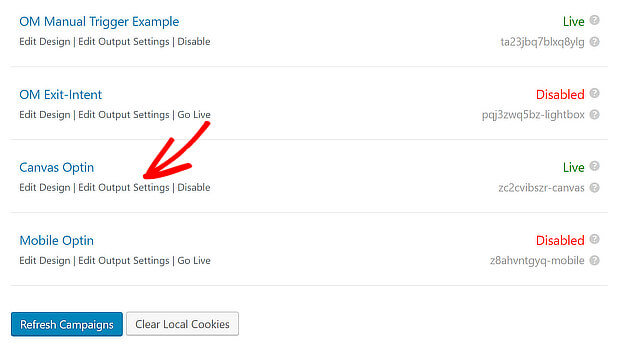
When you make your campaign live, visit your WordPress dashboard. Click on the menu link for OptinMonster.
This takes you to your list of campaigns. If you don’t see the name of your new WordPress survey campaign, click Refresh Campaigns. Press the Go Live link for the campaign you want to make live on your site.
When you see the campaign, you can tweak display settings even more with the Edit Output Settings button.
That allows you to limit the display of the popup to certain categories and tags, for example.
When you’re finished, click Save Settings to make your changes live.
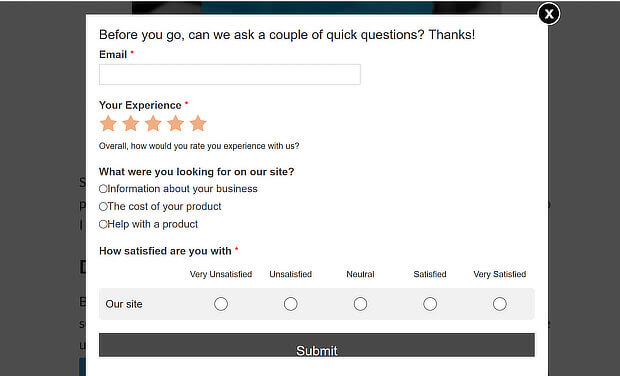
Here’s how the final WordPress survey popup looks:
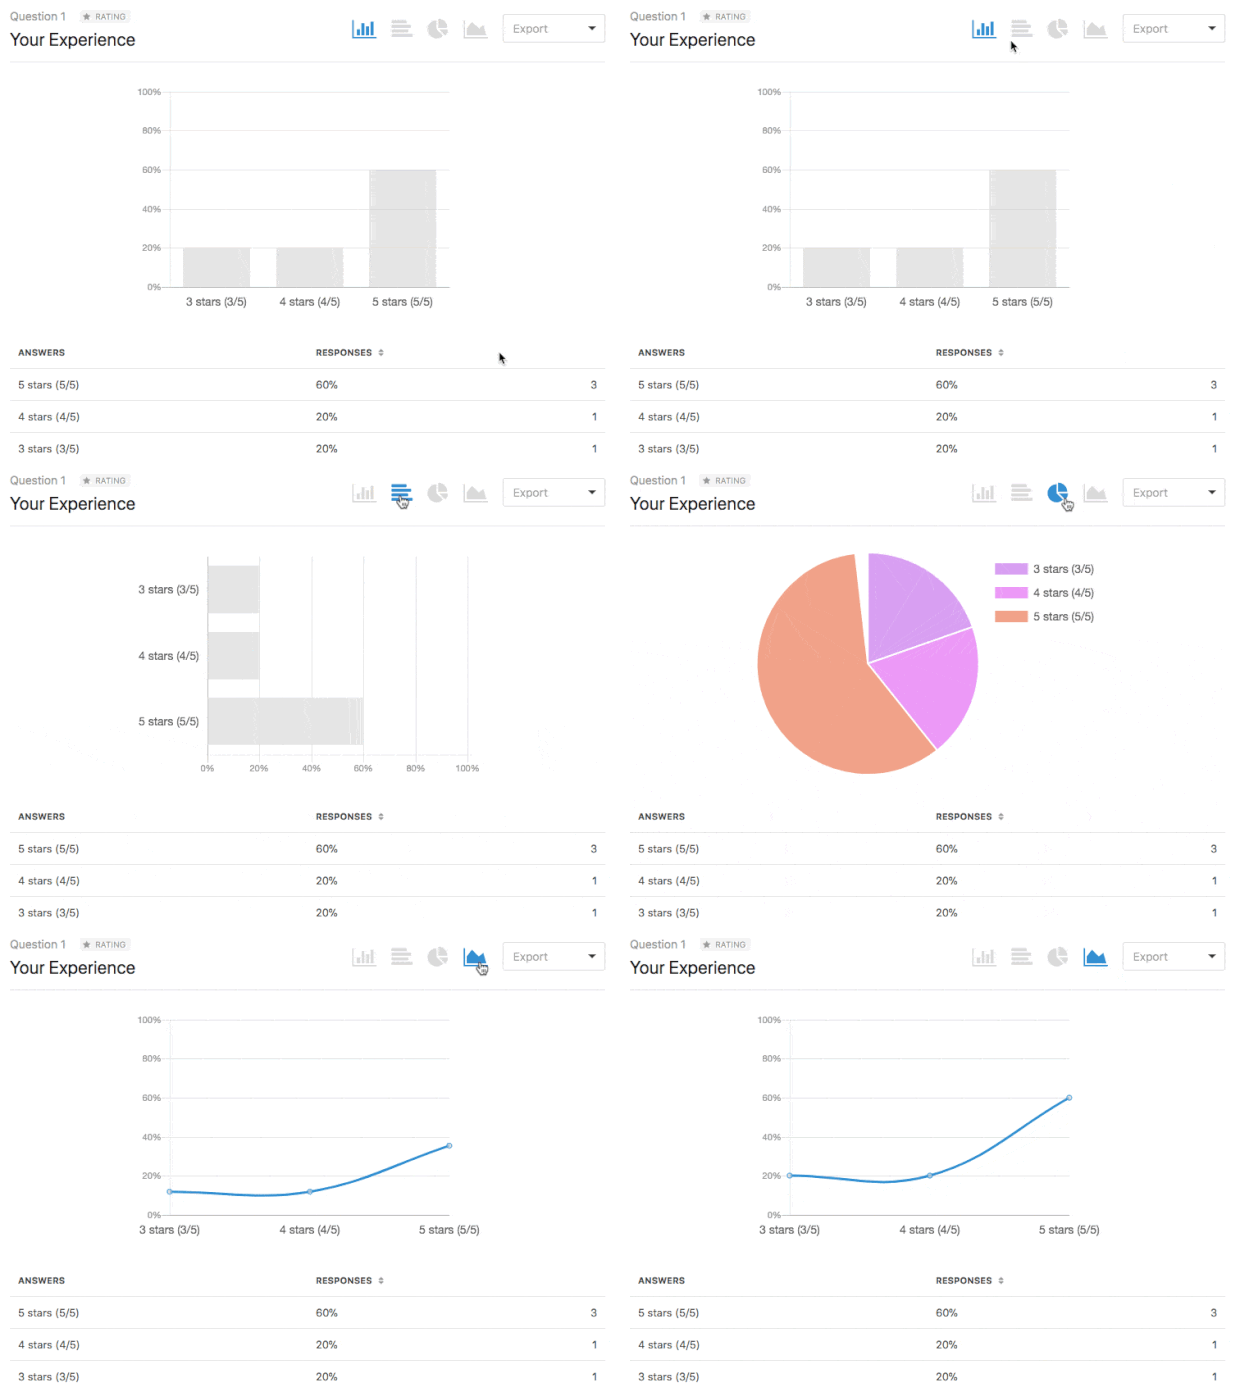
And once you start getting responses, you can view them in your WordPress dashboard:
Alternatively, you can use the powerful UserFeedback plugin to add survey popups to your WordPress site. That way, you can place user-friendly popup survey forms anywhere on your website pages and get valuable insights into your visitors’ opinions.
Top Tools Alert5 Best Survey Data Visualization Tools (In-Depth Comparison)
That’s it! Now you know how to discover your visitors’ secret thoughts with a WordPress survey popup so you can deliver exactly what they want and improve conversions, leads, and sales.
Looking for more growth tools and plugins for your WordPress site? Then check out our guide for the best WordPress plugins.
Next, read our tutorial on scheduling OptinMonster campaigns so you can create a time-limited survey popup or learn how to boost engagement with a video popup. If you’re using AWeber as your email marketing service, check out our tutorial on how to create a custom AWeber popup to grow your email list.
Not using OptinMonster yet? Get started today and start converting more visitors into subscribers and customers!













Add a Comment