In this guide, we’ll walk you through the best way to do this: creating a Like us on Facebook popup.
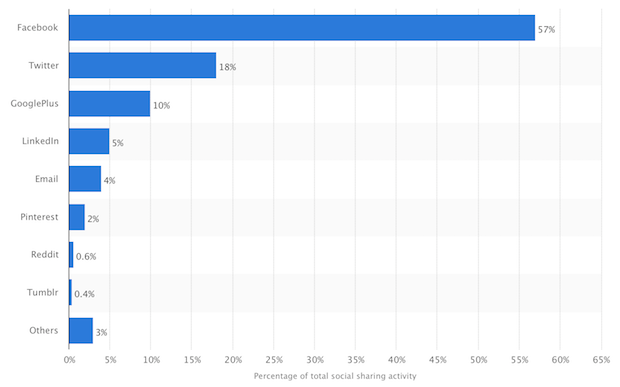
While email marketing has the best return on investment, there’s no question that social media is better for sharing.
57% of global content sharing activities occur via Facebook, whereas email only accounts for 4%.
If you want your content shared widely around the web, Facebook is the best place to get big results.
But in order for your content to be shared, first, you’ll need to grow your Facebook audience.
One of the best ways to reach potential Facebook fans is on your own website. After all, your website visitors have already shown interest in what you have to offer. Now you just need to convince them to take the next step: liking your Facebook page.
With OptinMonster, you can create a custom Like Us on Facebook popup.
Prefer written tutorials? No problem, just keep reading for step-by-step instructions.
Which Facebook Popup Plugin or Tool?
There are plenty of options for Facebook popup plugins and other software, but many of them will only allow you to create very basic popups that are more likely to do harm than good.
For example, if you set up a popup that appears the moment visitors land on your site, you may find that it angers and scares away as many visitors as it converts.
Popups can be super effective – IF used correctly.
OptinMonster is a great choice for creating effective popups because it gives you all the tools and features you need so that your popups don’t annoy your audience.
In a nutshell, you want to make sure your popups are displaying only to interested visitors, and only after they’ve had a chance to interact with the content on your website.
To accomplish that, you can:
- Delay your popup to appear only after visitors have explored 3 or more pages on your site.
- Time your popup to display after 30 seconds, so your visitors have a chance to read your content first.
- Use referral detection to only display your popup to visitors who arrived on your site via Facebook (since you’ll know for sure they use it!).
- Use Exit-Intent to only display your popup at the moment a visitor is about to leave your site forever.
OptinMonster also offers built-in split testing, so you can tweak and test changes to your Facebook popup to see what works best for your audience.
Ready? Let’s get started.
Create a “Like Us on Facebook” Popup
Step 1. Create Your Campaign
Login to your OptinMonster dashboard, and click on Create Campaign.
Choose a campaign type. For this tutorial, we’ll use one of our highest converting campaign types, a Popup.
Choose a template. Instead of one of the pre-designed templates, we’ll build one from scratch using the Canvas template. That’ll make it easy to implement the code we’ll get from Facebook.
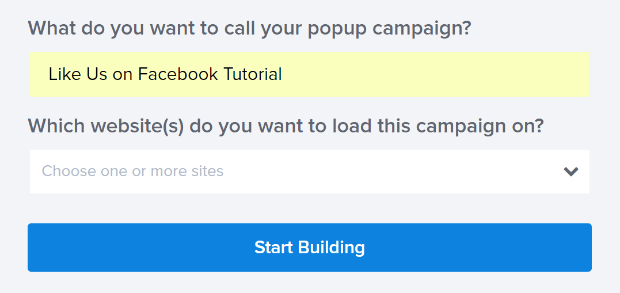
Name your campaign and select the website where you want it to load, then press the Start Building button.
This will take you to the OptinMonster campaign builder for the next step.
Step 2. Edit Your Campaign
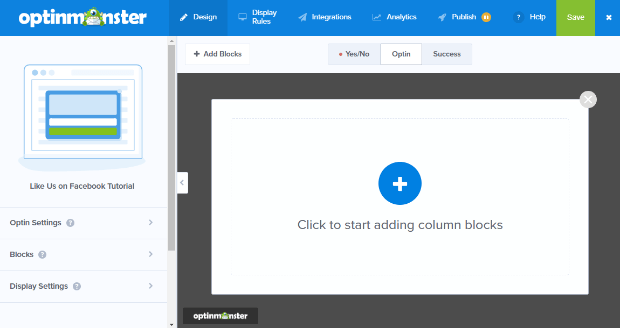
When you get to the campaign builder, you’ll see a blank campaign. Click on the big, blue plus sign to add a new Column Block.
Let’s add the single box. To add it, just drag and drop to the campaign preview.
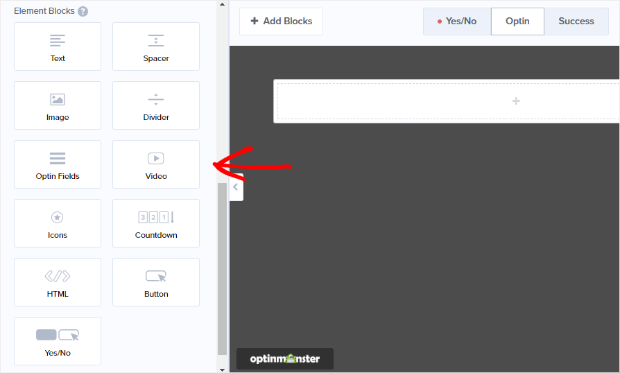
Once you’ve dropped the Column Block into your campaign you’ll see Element Blocks are available.
We’re going to add the HTML Element Block. Once again, just drag and drop the Element Block to your campaign.
Step 3. Get the Facebook Code
Leave the campaign builder open, and open the Facebook Page plugin web page in a new tab.
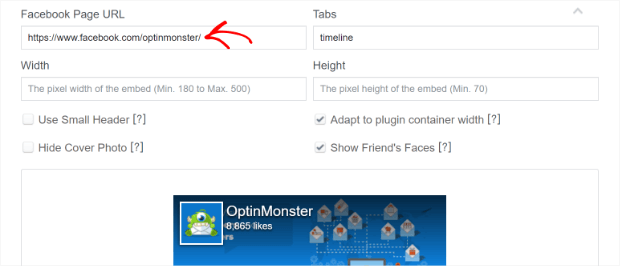
Enter the URL of your Facebook page.
Adjust the width and height to meet your needs. We’re using 500 px wide and 250 px high.
Adjust other settings as needed. For example, we selected Use Small Header so there’s more page content on display in our like box popup.
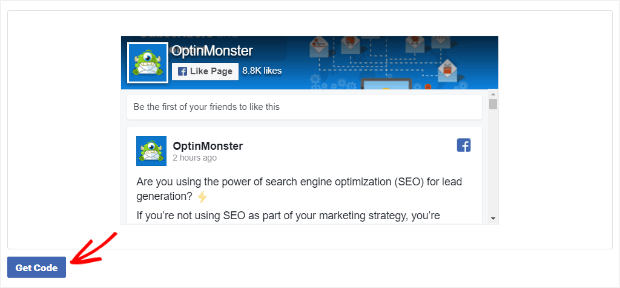
Click the Get Code button. A box will pop up.
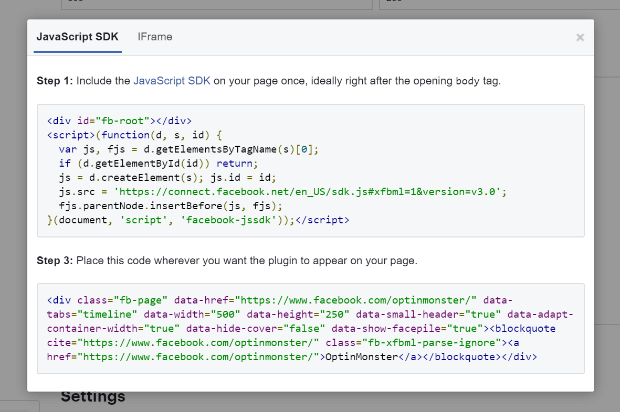
Facebook provides two blocks of code.
Copy the first block. Keep the tab open, as you’ll need to come back to grab the second block of code.
Step 4. Add the Facebook Code to Your Campaign
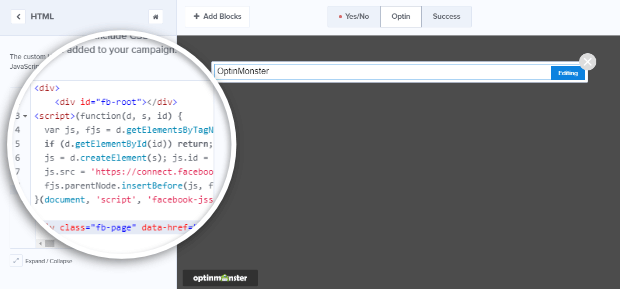
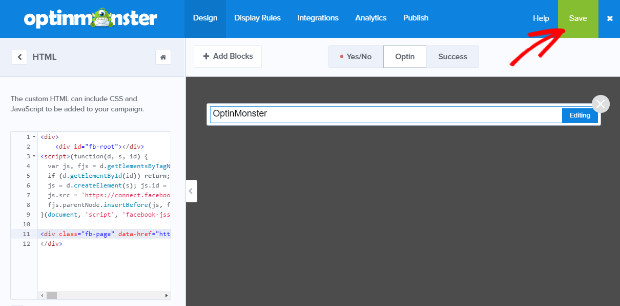
Go back to the campaign builder, and paste the first block of code you copied from Facebook. Return to the tab with the Facebook Page plugin website and copy the second block of code. Paste this code below the first block of code.
Save your campaign.
Take a look at your campaign by going to the Publish tab and setting the campaign’s status to Live. You’ll want to save your campaign again.
Now, select Shareable MonsterLink™ in the Platform section. Copy and paste the provided link in a new tab.
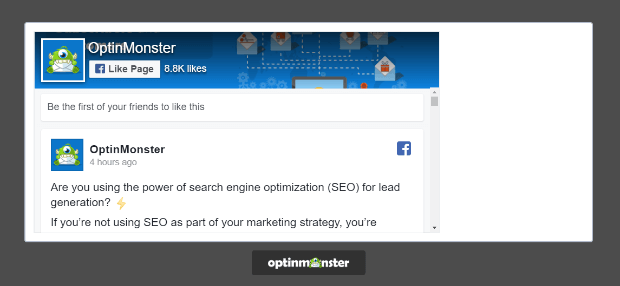
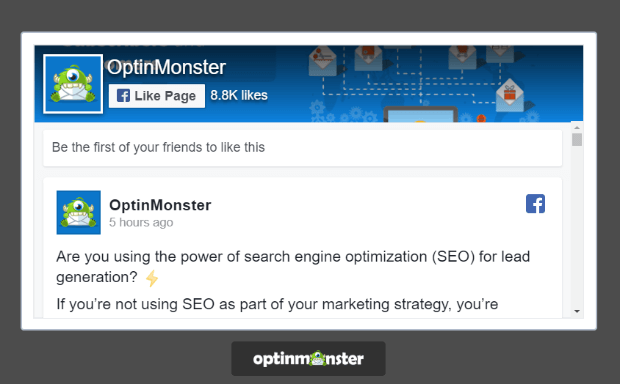
This is what our campaign looks like so far:
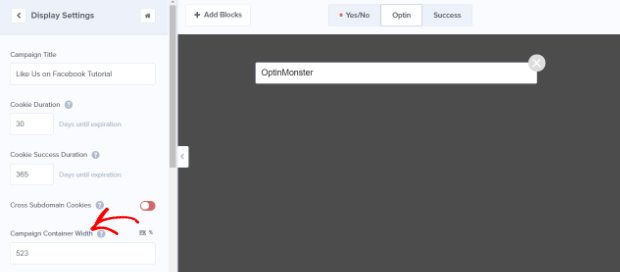
Next, we’ll need to adjust the size of the Canvas background to better fit the Facebook Like box. Go to Design » Display Settings, and change the values of Campaign Container Width as needed. We set ours to 523 px.
Save and check out your campaign again.
Step 5. Set Your Display Rules
Now we’re going to choose when the Like us on Facebook popup will display.
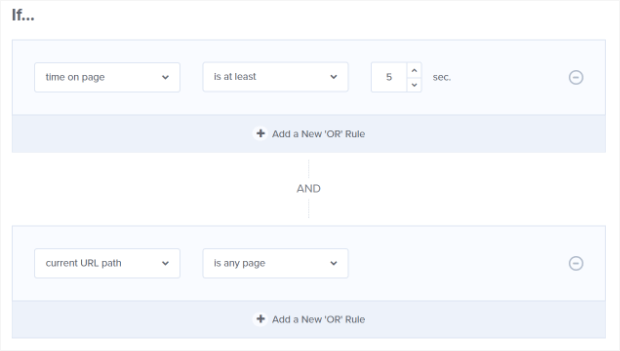
Go to Display Rules. Time on page AND current URL path is any page are selected by default to ensure that your campaign will display on any page after publishing even if you forget to enable a display rule.
But a better option is to show the Like us on Facebook popup only to visitors who’ve already shown they’re interested.
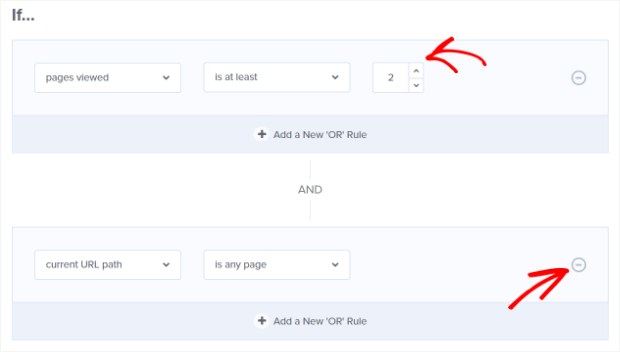
To do this, change the first rule to pages viewed is at least and set a number of pages. We suggest at least 2 because people who have looked at multiple pages are definitely interested in your content. You can delete the second rule by clicking on the minus sign to the right of the rule.
Save your campaign. Always.
There are many other display rule options you can use. For example, you can use our signature Exit-Intent® Technology to show the Like us on Facebook popup to visitors who are about to leave.
To enable this, change your rule to show if exit detected.
You can also choose to show a Like us on Facebook popup depending on specific visitor behavior. For example, if you have a blog post specifically about Facebook, you can use our advanced page level targeting to display the Facebook popup on that page.
These advanced targeting options let you show the right version of the right popup to the right visitors at the right time, increasing the chances that they’ll head over to your Facebook page and like it.
Step 6. Save and Publish Your Campaign
When you’ve finished editing your campaign Save it and head back over to the Publish tab.
You’ve already used the Shareable MonsterLink™, but you can add your Facebook popup campaign to any website with the account-wide or campaign-specific embed code. You can also easily add the campaign to a WordPress website.
This is a popular option, as so much of the web runs on WordPress. Here’s how you do that.
How to Add a Facebook Box to WordPress
When you start using the OptinMonster app, you install our connector plugin. That’s what allows all your campaigns to display.
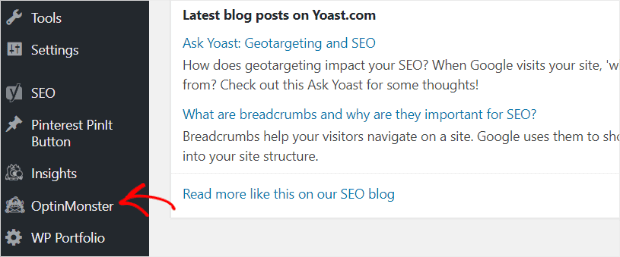
When you make a new campaign live, go to your WordPress dashboard, and click on the OptinMonster link in the menu.
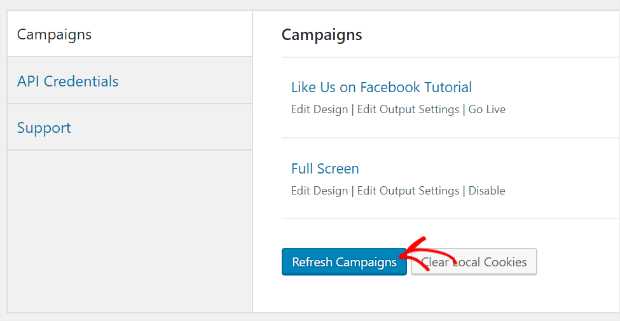
If your new campaign isn’t listed click on the Refresh Campaigns button.
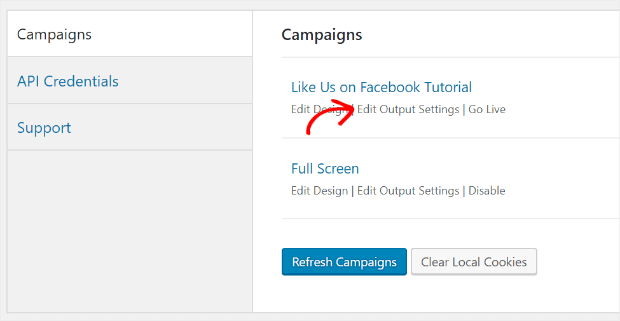
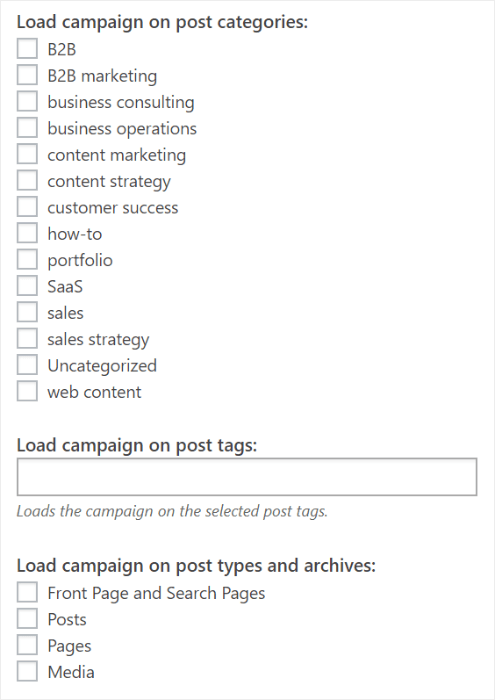
Once it shows, you can click on the Edit Output settings to tweak campaign display even more.
For example, you can include and exclude display not just on pages but also on certain blog categories.
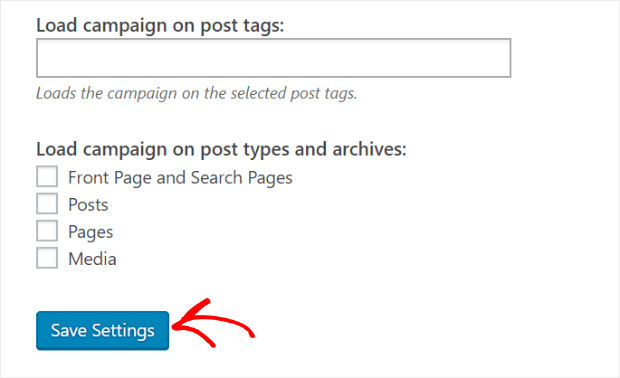
When you’re done, click Save Settings so your changes will take effect.
Finally, click Go Live.
That’s it! Now you can easily expand your social media network with a high converting Like us on Facebook popup.
To create the most effective popup, see our list of email popup best practices.
Looking for more tools to grow your business? Check out our roundup of the best plugins and tools for WordPress sites.
Not using OptinMonster yet? Get started today and convert more visitors into subscribers and customers than ever before!















Add a Comment