Need a quick trick to grab your visitors’ attention and boost conversions? With OptinMonster’s advanced targeting features, it’s easy to personalize your optins so they’re targeted to each individual visitor. In this article, we’ll show you how to use unique personalized optins to boost conversions with some cool examples.
Why Personalization Matters
Personalizing the content of your site to address a specific visitor is proven to bring in more conversions.
Take a look at these stats:
- A study by HubSpot reveals that personalized content outperforms static content by 42%.
- 74% of your customers are expecting personalized user experience on your site and feel frustrated when the content is not tailored to their personal preferences.
An optin that’s personalized to each unique user is much more attention-grabbing and effective than a generic optin meant to appeal to everyone.
1. Personalize With Your Customer’s Name
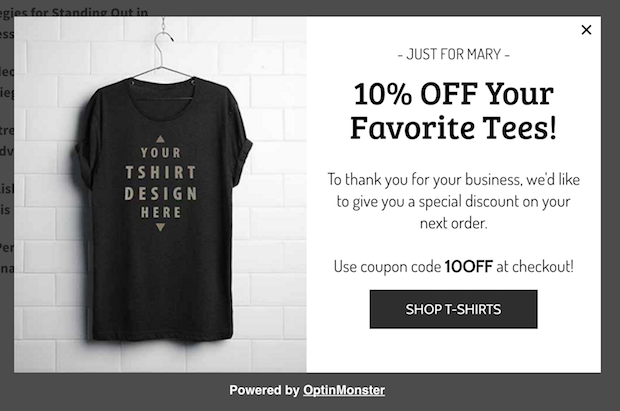
The most obvious way to personalize an optin form is by including the name of your customer in the copy.
For example, you could send an email to an existing customer thanking them for their recent purchase, and offering a special discount on their next order.
In that email, you can promote a link to your website where you can display a personalized popup mentioning the name of the customer at the top to further boost conversions.
You can easily create a personalized popup with your customer’s name using OptinMonster’s Smart Tags feature.
Though “Smart Tags” sounds like jargon, a basic personalized optin like shown above can actually be pretty simple to set up even for beginners. There are also plenty of more advanced uses for more tech-savvy users. You can read more details on how it works in our OptinMonster Smart Tags guide.
Smart Tags allows you to personalize your campaigns based on any data you have stored, including your visitor’s:
- name
- location
- gender
- age
- …and more.
To create the example above, you’ll need to have an email list with your subscriber’s first names.
If you’re using MailChimp, the default merge tag of first names is *|FNAME|*. (If you’re using another email newsletter service, make sure to use the merge tag that your email provider uses for first names.)
First off, send your subscribers an email with a promotional link. You’ll need to include the merge tag in your URL. This ensures that the name that MailChimp has stored for that subscriber is passed along to the optin on your website.
For example, if you want to send your subscribers to this link:
http://www.example.com/page
Here’s how you would add the merge tag to the URL:
http://www.example.com/page?fname=*|FNAME|*
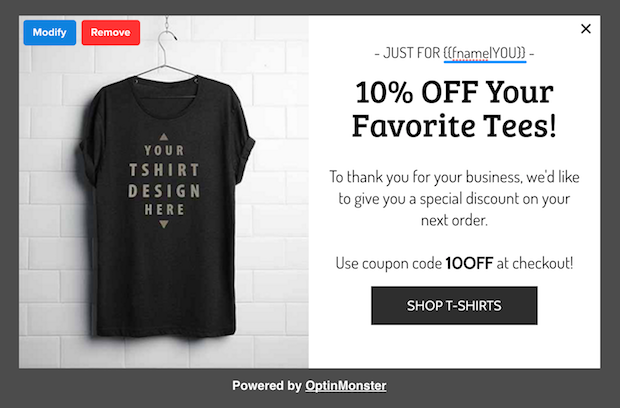
In our example OptinMonster campaign, the merge tag we’re using is {{fname|YOU}}. You can include it where you’d like to show the first name of your visitor.
In the screenshot below, you can see how it looks in the OptinMonster builder:
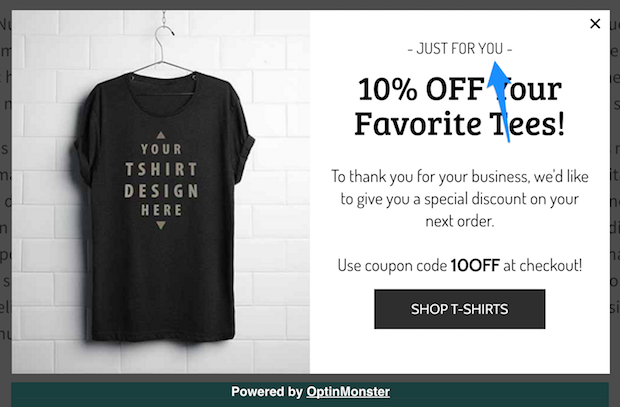
If the “fname” variable is not defined for any user, the visitor will see something like this:
2. Personalize on the Basis of Visitors’ Location
Do you run a multi-regional website? Want to direct your visitors to a localized website based on your users’ location?
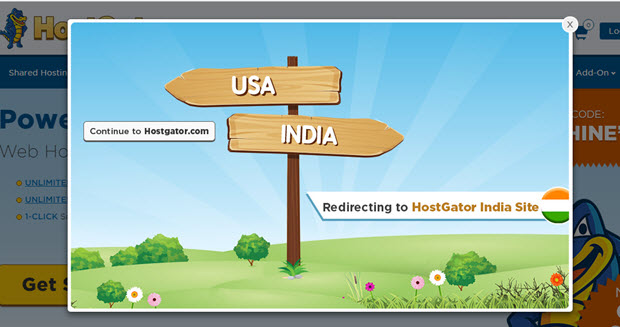
You can use a location-based popup to resolve the issue. Take a look at how HostGator handles it with a location based popup below.
Whenever someone tries to visit the HostGator’s main site, they redirect their visitors to the local version of their site if available. In addition, when the site is being redirected, they also give an option to visitors to return to their main site if they wanted to through a popup.
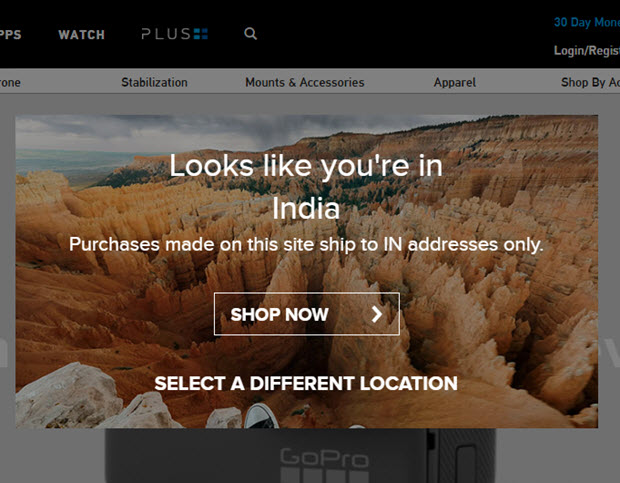
On the other hand, GoPro shows a location-based popup a bit differently.
Instead of redirecting visitors to a local version of the site, they ask users to confirm their location for shipping purposes.
You can easily build an optin like this using OptinMonster’s geolocation targeting to create an optin that only displays to visitors in a specific location.
3. Show a Personalized Upsell Offer
Want to encourage your customers to spend more when they make a purchase?
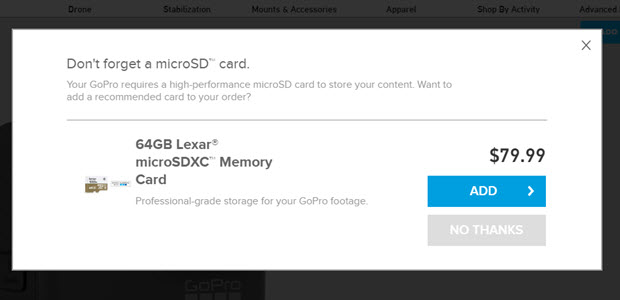
You can recommend your customers to purchase an additional product using a personalized popup whenever they add a product to the cart.
For example, GoPro suggests their customers buy a microSD card when they purchase a GoPro camera.
This type of upselling is a great strategy to encourage your customers to spend more on your store when they make a purchase.
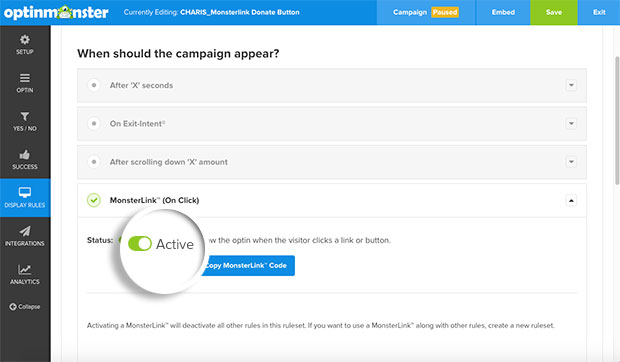
With OptinMonster, you can easily trigger an upsell popup whenever someone adds a product to your cart. To do this, you can enable Monster Link option in Display Rules and embed your MonsterLink on the Add to Cart button.
This way, whenever someone adds a product to your cart, your upselling popup campaign will be triggered immediately.
4. Create a Sense of Urgency
Looking for an easy way to reduce the shopping cart abandonment rate of your online store?
With personalized optins, you can encourage those abandoning customers to complete their order by creating a sense of urgency.
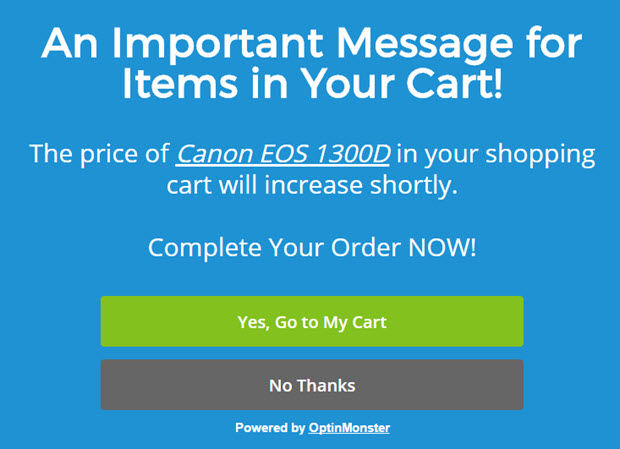
For a more advanced example of OptinMonster’s Smart Tags, imagine that a customer has recently added a product to the cart but forgot to complete their order. During the next visit, you can welcome the user with a personalized welcome gate or popup, enticing to complete the order.
The above popup uses scarcity based urgency, in order to entice the customer to complete the order. It warns their customer by notifying that the price is about to increase. To purchase for the lowest price, they have to complete the order immediately.
See our guide on using urgency to hack your conversion rate for more examples of how scarcity can boost your conversions.
5. Use Page-Level Targeting
You can create optins that are customized for each product in your online store using the page-level targeting feature. This allows you to segment your email list and group your subscribers based on their interest and interaction with your website.
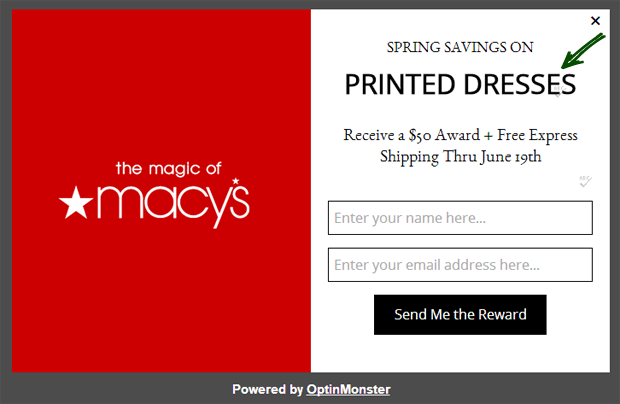
Take a look at an example popup below.
In this popup, the name of the product is used in the copy. Since the popup will be customized according to the product page it appears, the copy would be targeted to your customers’ needs. This tactic can help to increase conversions.
That’s it!
Hopefully, this guide helped you to further improve your conversions by personalizing your optins. If you enjoyed this guide, you may also want to check out these ways to use OptinMonster follow ups to boost engagement and sales, and ultimate guide to eCommerce personalization.
Not using OptinMonster yet? Get started today and start converting more visitors into subscribers and customers!




Add a Comment